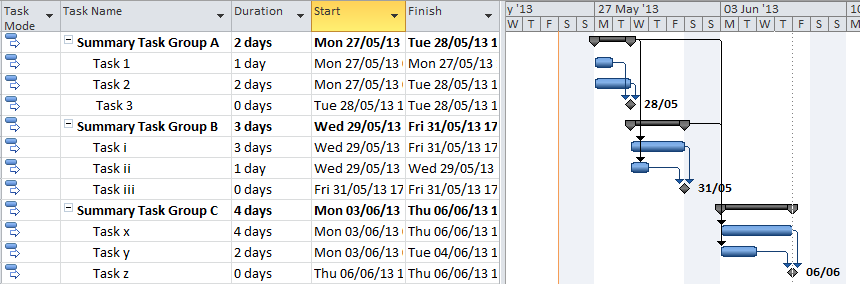
Take the example below (Figure 1). We can save a lengthy discussion about Duration and Work for another time.
 |
| Figure 1 |
You'll see a very brief example project plan with some milestones, tasks and all the usual carry on.
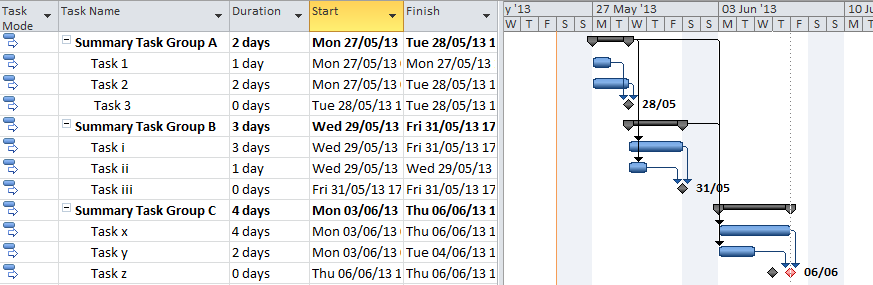
It's not everyday that you get to play spot the difference on this blog but have a look at the illustration below (Figure 2). What's the difference? And, does it matter?
 |
| Figure 2 |
How about Figure 3 then?
 |
| Figure 3 |
Last one then. Have a look at the excerpt below. It's actually the same as Figure 3 - but just formatted a bit differently.
 |
| Figure 4 |
This is hard enough to spot and track on this simple example. At the 50 to 100 row level its next to impossible (yes - I know Project helps with highlighting tasks which change but that's not a panacea for us here. Particularly when plans are being shared and updated by multiple parties).
What is shown in Figure 4 however is a tiny bit of formatting on a baselined project plan and it is immediately apparent that the milestone has moved. I think this is very very helpful. It helps you (the project planner or project manager) while tinkering with your project plan to see what you have manipulated and which milestones move and by how much. It's also extremely helpful in tracking a milestone summary derived from several plans - but we'll come to that another day.
For now a quick explanation on how this is done.
- Baseline your project plan. In Microsoft Project 2010, select Set Baseline from the Project group on the ribbon.
- Select (say) Baseline1 from the drop down (you can use the default)
- Click OK
- Select Format | Bar styles from the Format group on the ribbon
- In the name column, find Milestone and change the colour to Red (for instance)
- Select Insert Row, enter Baseline1 in the name column, format your the appearance as a black milestone, enter Milestone in the Show for tasks column and select "Baseline1 finish" for both the From and To fields.
The output should end up looking like Figure 5 below. Click Okay to apply the changes.

Adjust your project plan to push out a milestone and you will see both the original baseline milestone and the new milestone date.
Very handy.
No comments:
Post a Comment